
Your cart is empty.
Before you begin
Before starting, gather the Witsee sensor, one of the three supplied mounts, the screwdriver, your bowling ball, and an iOS or Android device.
- Install the Witsee app only from the Apple App Store or Google Play.
- Clean and dry the chosen finger hole before fitting a mount.
Important
The sensor is a training tool. Do not use it in official competition unless the responsible governing body allows it. Before every throw, confirm the mount is secure and does not affect your grip or release.
1. Prepare the sensor
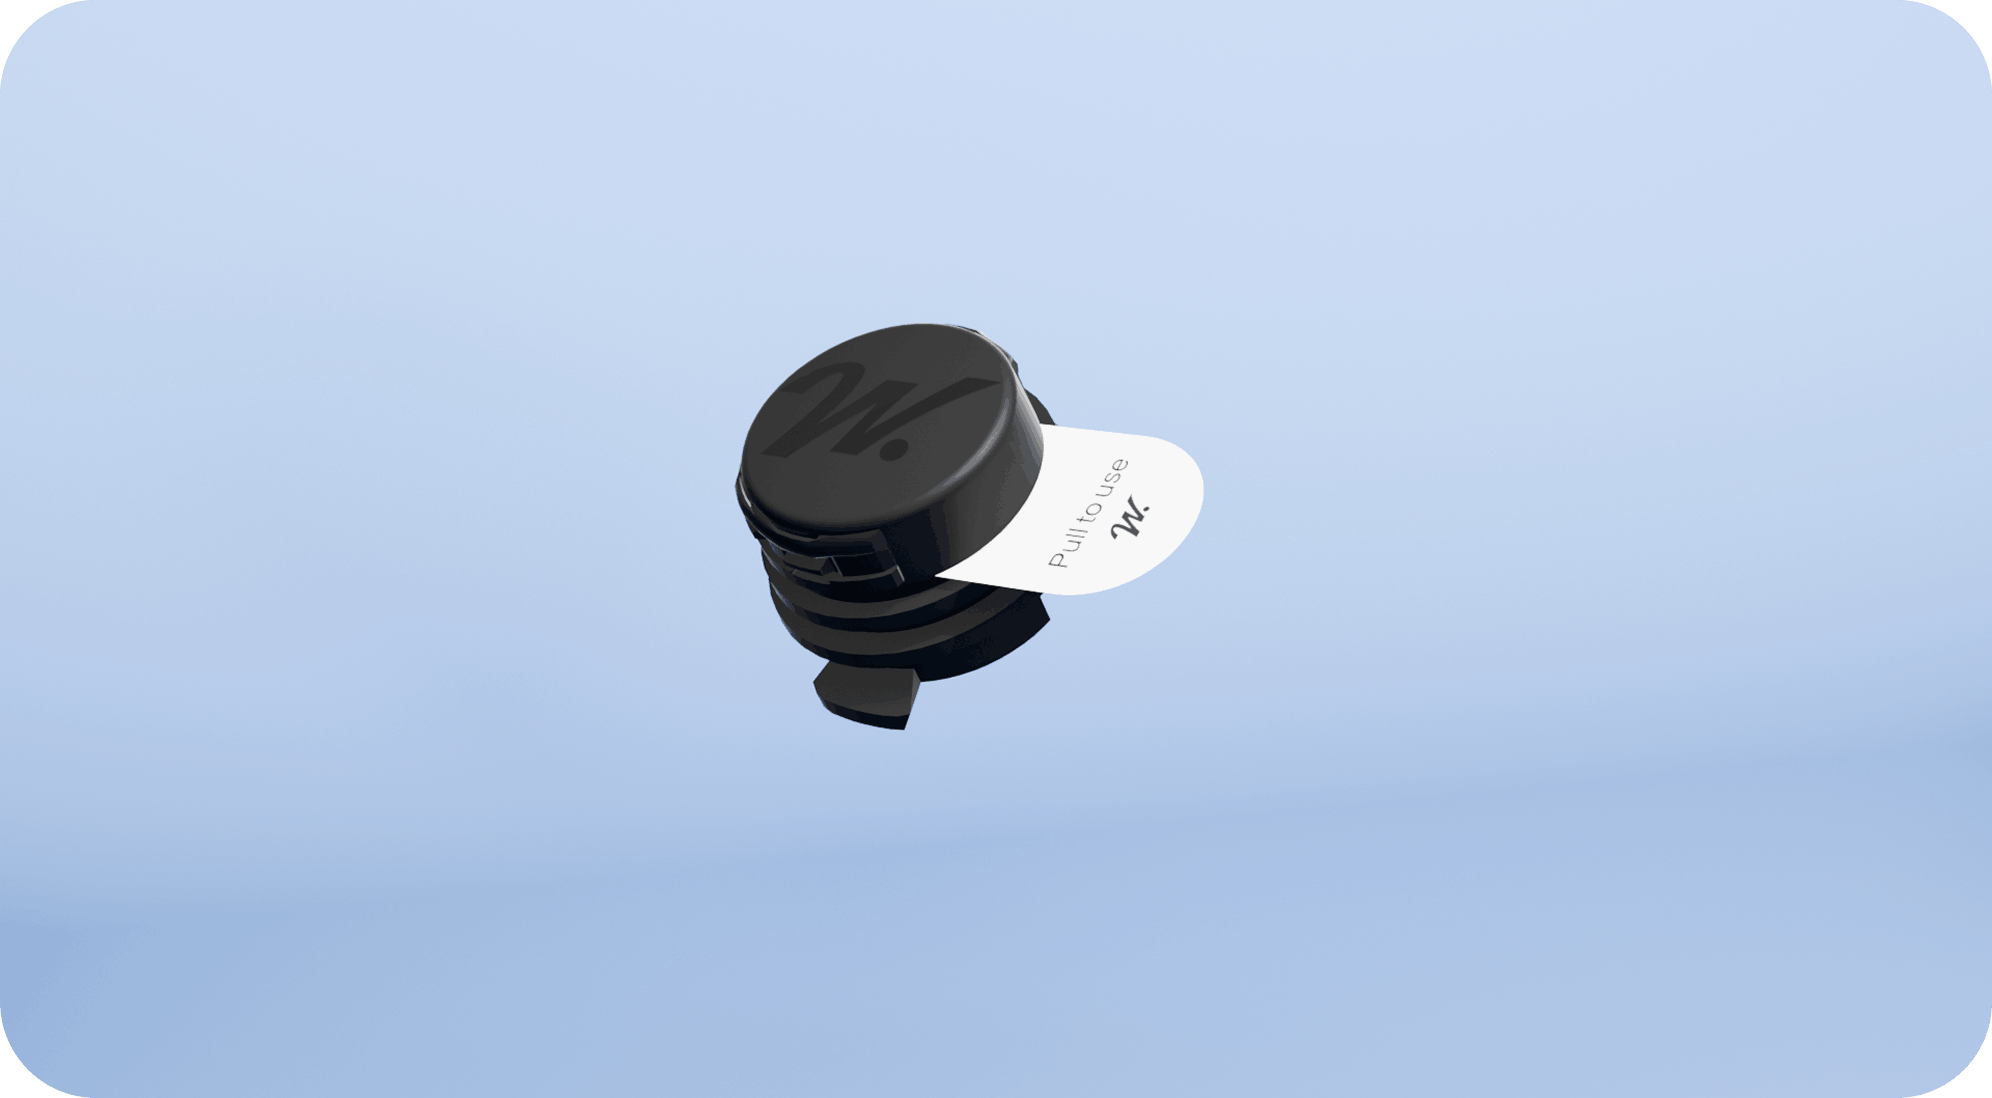
Remove the battery separator
1
Locate the separator tab for the pre-installed battery.
2
Pull the tab straight out of the sensor.
3
The status LED should blink for about 5 seconds after the separator is removed.
4
Pick up the sensor to wake it and make it discoverable to the app.
2. Account and connection
Set up the app
1
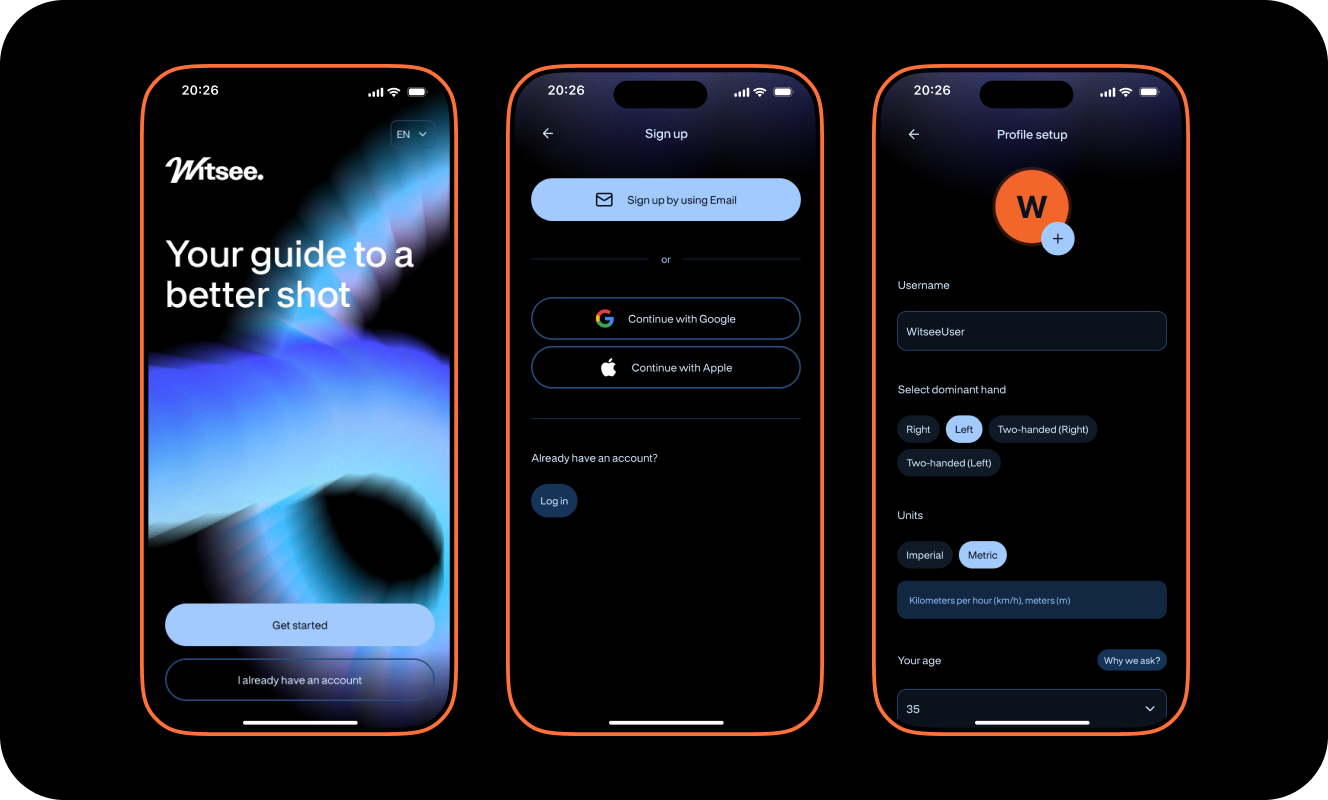
Open the Witsee app and choose Create account. If you already have an account, sign in.
2
Complete any email verification shown in the app.
3
Allow Bluetooth and any other permissions requested for sensor discovery.
Connect the sensor
1
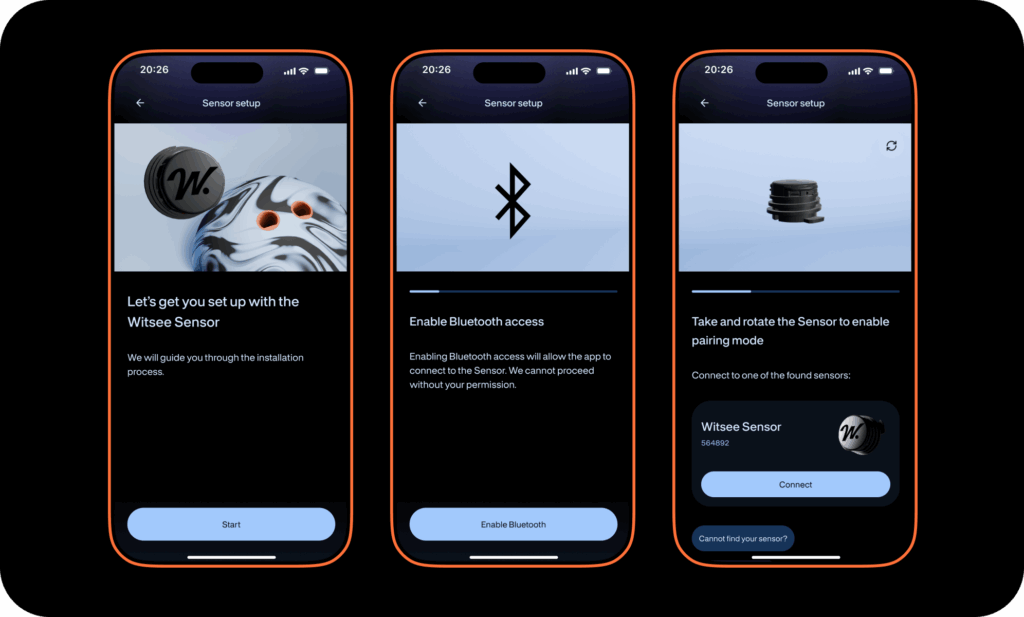
Make sure Bluetooth is on, then tap New sensor.
2
Lift the sensor to wake it and keep it next to your device while the app scans. It might take up to 30 seconds until the sensor is found.
3
Select the sensor shown in the list and wait for the Connected confirmation.
Do not pair the sensor in your device's general Bluetooth settings unless the Witsee app specifically asks you to.
Sensor not found?
Lift it again, move it closer to the device, and check app permissions. If it is still not found, remove and reinsert the battery, confirm the polarity, then scan again.
3. Install the sensor in the ball
Choose the installation method and mount
1
Check how close the finger grip sits to the bottom of the finger hole.
2
If the grip sits close to the bottom, use the friction-fit method and choose the mount that best matches the finger-hole or grip size.
3
If there is space beneath the grip because it is cut short or the hole is drilled deeper, choose the smallest mount and use the adhesive method.
Friction fit method
Seat the selected mount evenly. It must grip firmly and must not rotate or lift under normal hand force. Do not pack gaps with improvised material.
Adhesive method
Use cyanoacrylate adhesive (Super glue). Apply the minimum amount to the mount base, keep threads clear, and allow it to cure fully before use.
Stop and check
Do not continue if the mount is loose, cracked, misaligned, or touches the bowler's finger. An unsafe fit can affect release, damage the product, or cause injury.
Install the sensor
1
Attach the screwdriver’s T-shaped end to the sensor.
2
Align the sensor with the mount and screw it in until snug. Do not overtighten.
3
Confirm that the sensor does not move, rattle, rotate, protrude into the grip area, or interfere with release.
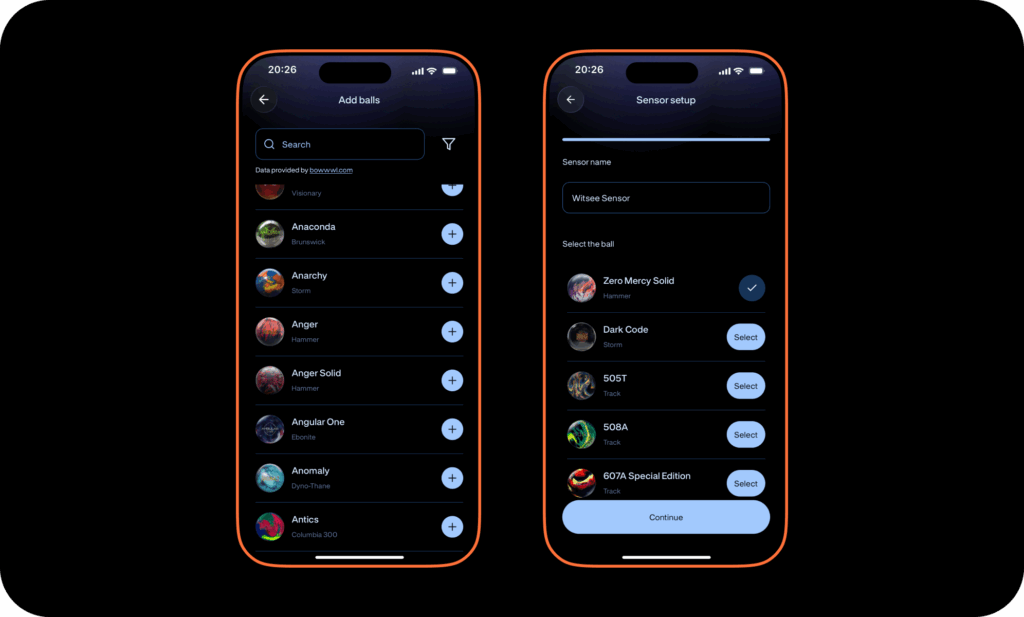
Select a ball to complete sensor setup
1
In the app, in the Ball Library, add your bowling balls.
2
Continue the sensor setup flow, select the bowling ball to assign it to your sensor.
Removing the sensor or mount
1
Sensor: hold the ball securely, attach the screwdriver’s T-shaped end to the sensor, and turn steadily to unscrew it.
2
Glued mount: screw the screwdriver’s threaded end into the mount and continue turning. Firm resistance is normal; keep turning until the mount pops out by itself.
3
Friction-fit mount: remove the sensor, screw the screwdriver’s threaded end into the mount, then pull straight out with steady force.
4. Start a live session
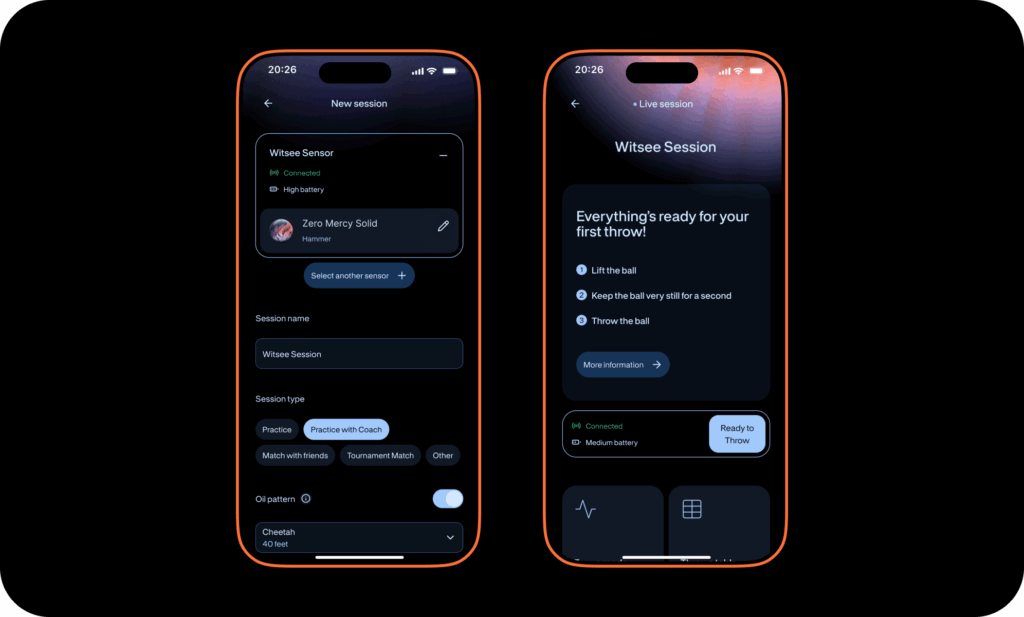
Review session settings
1
Sensor: select the sensor installed in the ball.
2
Session name: use a name you will recognize later.
3
Session type: choose the session type you'd like.
4
Oil pattern: optional; add it if known.
5
Approach length: enter the correct approach length so the algorithms can adjust the measurements more accurately.
Record a throw
1
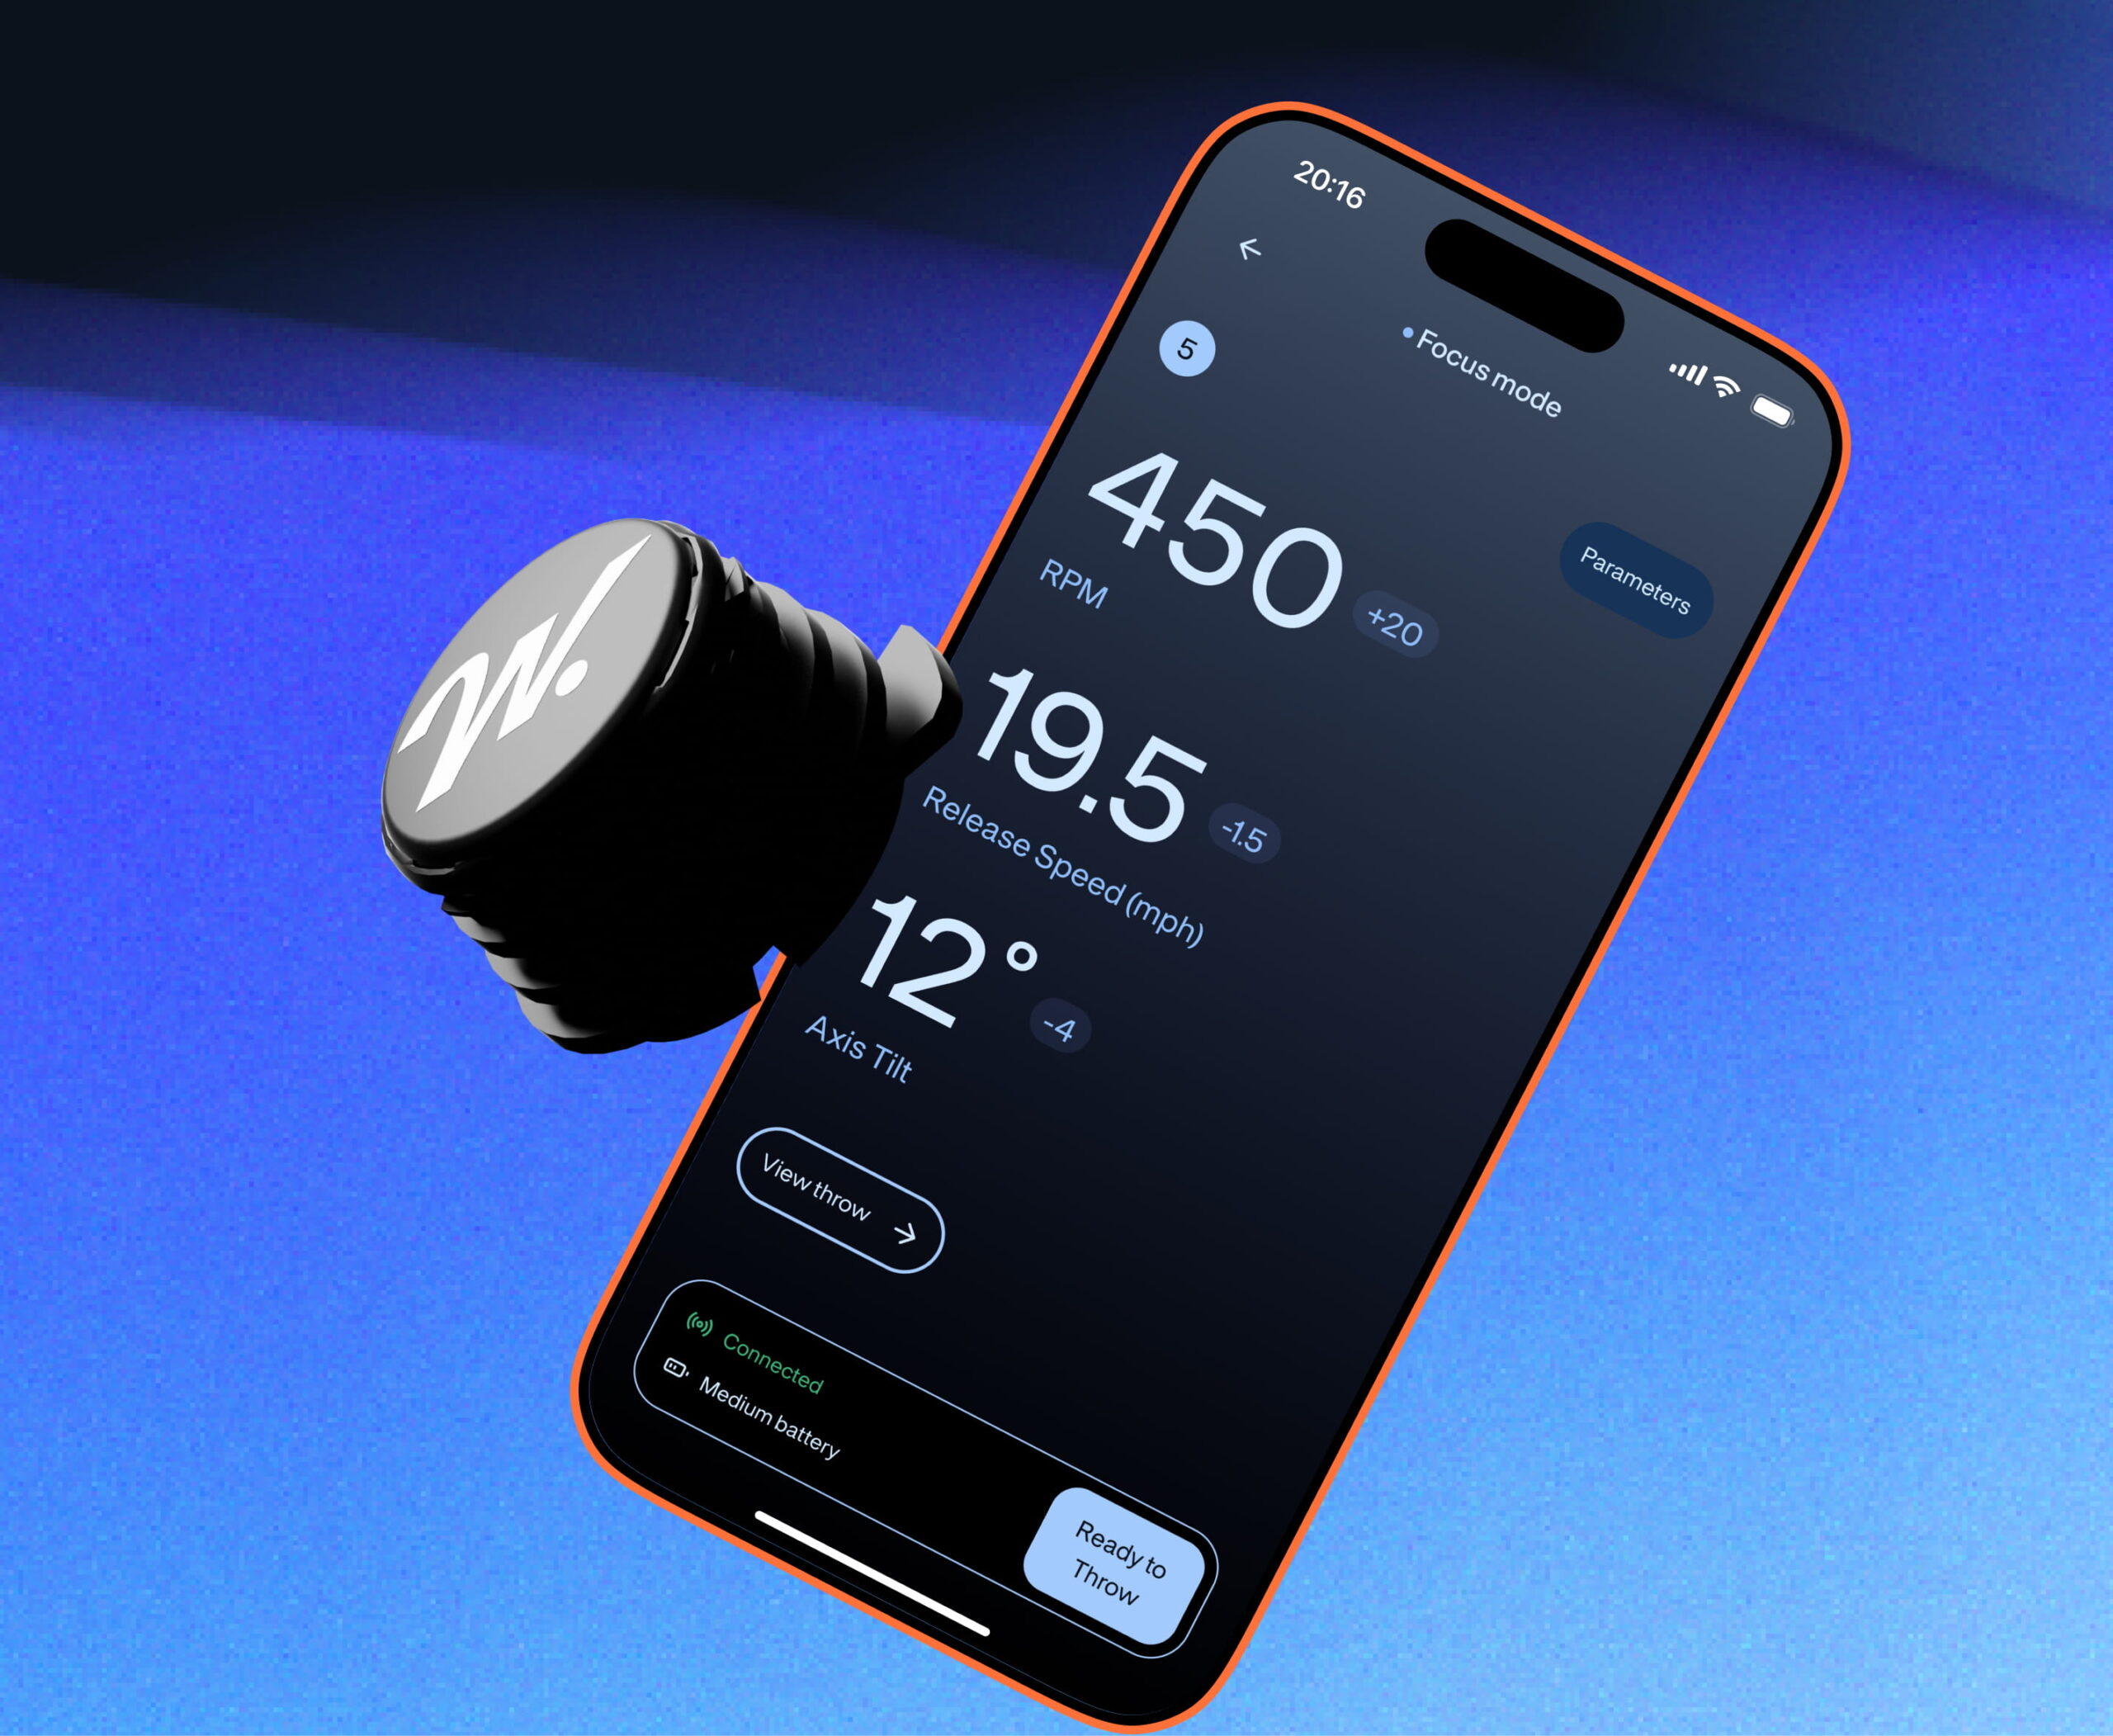
Wait until the app shows Ready to throw.
2
When ready, hold the ball very still for at least one second. This allows the sensor to calibrate before the throw and provides the best results.
3
Make your normal approach and delivery, wait until the ball is back.
4
Wait while the app reads and processes the data. Do not remove the battery or force-close the app.
5
Wait until the app is ready before starting the next throw.
What the status means
Status
What to do
Ready to throw
You can pick up the bowling ball and start your approach.
Throw in progress
Complete the delivery normally.
Reading data
Keep the app open and wait for transfer.
Please wait
Processing is not finished; do not start the next throw.
Connection lost
Move the device closer, reconnect, and check whether the throw was saved.
Sleeping. Lift to wake.
Pick up the sensor or ball and wait for it to reconnect.
5. Review results and end the session
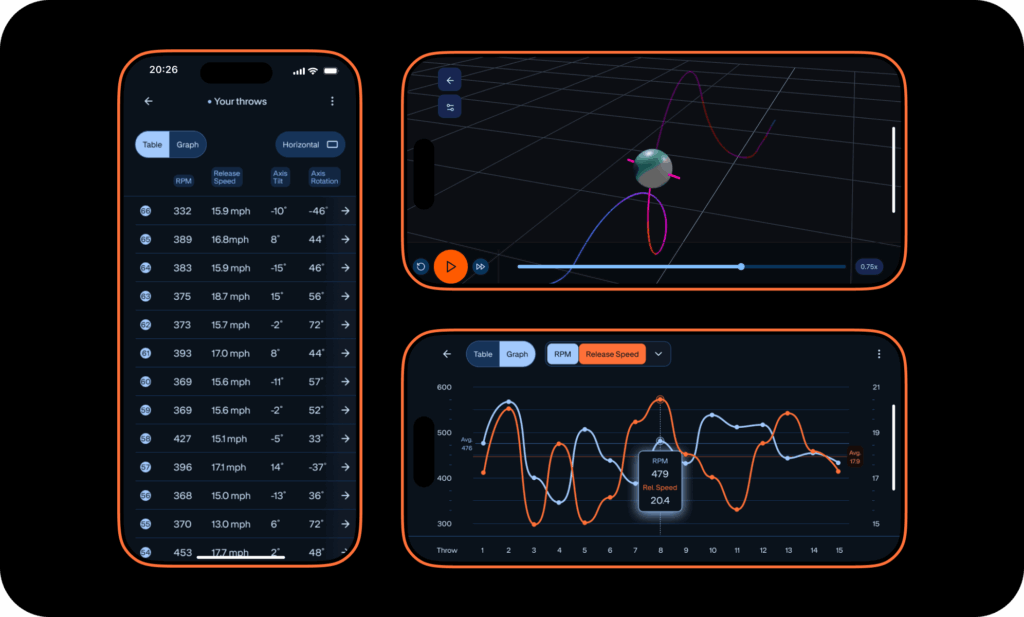
After each valid throw, the app shows numerical metrics, throw-based graphs that track how each parameter changes from throw to throw, and a 3D visualization for that throw. Available data may vary by subscription plan.
Numerical results:
Quickly review values such as rev rate, axis tilt, axis rotation, loft, loft angle, swing height, and more.
Graphs:
See how each parameter changes from one throw to the next.
3D visualization:
Replay the ball's movement to connect the numbers with the delivery.
Warnings and measurement limits
If a throw receives a warning, the app displays the warning and may leave some parameters uncalculated. For example: “Some data is not available or might not be accurate. To ensure best results, try to maintain a very still position for at least 1 second before beginning the motion.” Repeat the throw after holding the ball very still for at least one second.
Results can also be affected by a loose mount, movement before the swing, unusual impacts, or a lost connection. Use repeated measurements together with coaching and video when making technique decisions.
End the session
1
Wait for the final transfer to finish, then save the session.
2
The sensor enters deep sleep automatically and may remain installed in the ball.
3
At the next session, rotate the ball to wake the sensor.
6. Battery, care, and updates
Replace the battery
1
Replace the battery when the battery indicator in the app says “Low battery”, or the sensor fails to connect to the app.
2
Remove the sensor from the ball and make sure it is clean and dry.
3
Open the lid with the small blade on the screwdriver and remove the old battery.
4
Insert a new, compatible CR1025 3V battery – such as Akiga, Panasonic, Energizer, or Ansmann – with the correct polarity. Seat it fully, then close the lid securely.
5
Confirm that the LED blinks, reconnect in the app, and check the reported battery level.
Battery safety
Keep CR1025 batteries away from children and animals. Do not recharge, short-circuit, heat, damage, or insert a battery with reversed polarity. Do not insert other types of batteries.
Sensor states outside a Live session
Outside a Live session, the sensor battery consumption is very low. You do not need to switch it off manually after normal use.
Awake and available
When the sensor is awake, the app can detect it and connect automatically when Bluetooth is enabled and the app is open nearby.
Automatic sleep
After 2 hours without activity, the sensor automatically enters a low-power sleep state. Battery use in this state is extremely low.
Manual power off
A Power off option is available in the app under Equipment → Sensor options, but it is not needed for everyday battery saving.
Wake and reconnect
Pick up and rotate the sensor or bowling ball. The sensor wakes automatically, and the nearby app can detect and reconnect to it.
Cleaning and storage
- Wipe with a soft, dry or slightly damp cloth. Keep the battery compartment and contacts dry.
- Do not immerse, pressure-wash, ultrasonically clean, or use acetone, strong solvent, abrasive cleaner, or adhesive remover on the sensor.
- Inspect the mount, threads, screwdriver features, and adhesive joint from time to time and after a hard impact.
- If removed from the ball, store the sensor in its case in a cool, dry place away from sunlight, heat, chemicals, and children.
Firmware updates
When the app offers an update, use a fresh or well-charged battery, keep the sensor close to the device, leave the app open, and do not remove the battery until the app confirms completion. Reconnect afterward.
7. Troubleshooting
Issue
Try this
Sensor not found
Turn on Bluetooth, grant permissions, lift the sensor, and move it closer. If it is still not found, remove and reinsert the battery and check its polarity.
Connection lost
Keep the device closer and clear of metal obstructions, keep the app active, reconnect, and confirm whether the throw transferred.
No throw detected
Wait for Ready to throw, confirm the correct sensor and ball, check the mount, and repeat with a steady start.
Results look inconsistent
Hold the ball still, verify the ball assignment, inspect the mount, and compare several throws.
Sensor or mount is loose
Stop using it. Remove and inspect the parts; refit or replace damaged components before another throw.
Sensor is hard to remove
Use only the screwdriver. For a glued mount, keep turning the threaded end until the mount pops out by itself.
Low battery
Install a new CR1025 3V battery, reconnect, and verify the battery level in the app.
Need help?
Email support@witsee.com with the sensor identifier, app version, device model, a problem description, and any warning screenshots. Current support: witsee.com/support
Before each session
Battery checked · correct sensor and ball selected · mount secure · grip unobstructed · app shows Ready to throw.